
Yoga Poses and Practice: A Functional Guide for Athletes and Active People
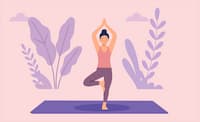
Table of Contents
Yoga poses aren’t arbitrary positions. Each one loads particular tissues, works particular muscles, challenges balance in particular ways, and supports or restricts breathing in particular ways. Understanding poses by what they do — rather than as a sequence to memorize or a tradition to perform perfectly — turns yoga from following a set routine into using a set of tools intelligently for specific physical and mental goals.
The Yoga Poses page organizes foundational yoga poses by their main function — what they do and why — rather than by their Sanskrit names or their place in a traditional sequence. Four categories cover what yoga’s physical practice offers: strength and stability, flexibility and opening, balance and focus, and recovery and restoration. For each pose, you’ll find what it does, why it’s useful, and how to do it safely.
It’s a practical reference for athletes and active people who want to use yoga as a complement to their training — choosing poses for what they need rather than following a sequence without knowing why.
How to Use The Yoga Poses Page
The four categories match the main uses of yoga for people who train, described on our mobility, flexibility, and recovery page:
Strength and stability poses — for building strength and control through a range of motion, which passive stretching alone doesn’t develop. Most useful as part of a dynamic warm-up or as a standalone session.
Flexibility and opening poses — for working on positions you find restricted. Most useful after training and in dedicated yin or stretching sessions, where longer holds let you relax into the stretch and accumulate stretching time.
Balance and focus poses — for developing single-leg stability, body awareness, and the steady attention described on our mindfulness in movement page. Useful as both balance training and attention practice.
Recovery and restoration poses — for winding down and shifting the nervous system toward its calmer state, as described on our yoga and the nervous system page. Most useful in the evening, before sleep, and at the end of any yoga session.
CATEGORY 1: STRENGTH AND STABILITY YOGA POSES
These poses build muscular strength, joint stability, and control through a range of motion. They’re the most physically demanding poses in yoga, and they complement resistance training by building strength and endurance in positions that free weights don’t always reach.
Warrior I (Virabhadrasana I)
What it does: Combines strength and stretch in one position. The front leg works the quadriceps and glutes in a deep lunge, while the back leg stretches the hip flexors and calf. Reaching the arms overhead with an upright torso encourages upper-back extension and overhead shoulder mobility.
Why it matters for training: It opens the front of the hips — which many people who sit for long hours feel as tightness — while practicing the upright torso and overhead arm position that overhead pressing and front squats require. Working strength and length in the same position builds usable, controlled mobility in a way that passive stretches can’t, and the lunge position complements squat training.
Technique: Step one foot forward into a lunge, with the back foot turned out at roughly 45 degrees. The front knee tracks over the front foot — not caving inward. Keep the back leg straight, or slightly bent if the hip flexor stretch is too intense. Square both hips toward the front as much as is comfortable. Reach the arms overhead, shoulders relaxed away from the ears. Breathe in to lengthen, out to settle deeper.
Duration: 5 to 10 breaths per side, staying actively engaged throughout.
Warrior II (Virabhadrasana II)
What it does: Works the front leg’s quadriceps and the hip muscles that keep the knee tracking outward, while opening the inner thighs. Holding the arms out builds shoulder endurance, and sustaining the pose builds muscular endurance — and the ability to stay calm with sustained effort.
Why it matters for training: Strong hip abductors and rotators help keep the knees aligned during squats and lunges — and hip strengthening is a well-supported part of rehabilitation for common knee pain. The long hold also builds endurance in a way that short barbell sets don’t.
Technique: Stand with your feet wide apart, front foot pointing forward and back foot turned out at roughly 90 degrees. Bend the front knee toward 90 degrees, tracking over the front foot. Keep the back leg straight, pressing the outer edge of the back foot into the floor. Extend the arms parallel to the floor and look over the front hand. Keep the hips open to the side rather than rotating forward. Breathe steadily throughout.
Duration: 5 to 10 breaths per side.
Plank Pose (Phalakasana)
What it does: Builds core strength and shoulder stability, and teaches the whole body to work as one rigid unit. Unlike isolated ab exercises, the plank requires the shoulders, core, and hips to work together — the kind of full-body stiffness that keeps the spine stable during compound lifts.
Why it matters for training: Core endurance and the ability to brace support heavy squats and deadlifts, and pressing on straight arms works the muscles that stabilize the shoulder blades.
Technique: Start in a push-up position with hands under your shoulders and fingers spread wide, or on your forearms for a forearm plank. Your body forms a straight line from head to heels — no sagging hips or hips piked high. Brace your core, squeeze your glutes, and keep your neck neutral. Keep breathing steadily rather than holding your breath.
Duration: 20 seconds to 1 minute, depending on your strength. Several shorter holds with brief rests usually allow better form — and more total quality work — than one long hold.
Chaturanga Dandasana (Low Push-Up)
What it does: Builds triceps, chest, and shoulder strength. Used as a transition in flowing yoga, it’s demanding enough to be a pressing exercise in its own right — essentially the lower half of a narrow-grip push-up, lowered slowly and held.
Why it matters for training: Slow, controlled lowering builds pressing strength and shoulder control that complement bench press training.
Technique: From plank, lower your body as one unit, bending the elbows and keeping them close to your sides, pointing back rather than out. Stop when your shoulders are level with your elbows — not lower. Letting the shoulders dip below the elbows, especially with the shoulders rolling forward, puts strain on the front of the shoulder and is a common cause of yoga shoulder injuries. Keep your body in a straight line — no sagging hips or leading with the chest. It’s a demanding position: lowering with your knees on the floor is a good way to build up to it.
Duration: 1 to 5 repetitions, depending on your strength, with full control of the lowering phase.
Chair Pose (Utkatasana)
What it does: Builds quadriceps strength and endurance in a held squat, while the arms reach overhead — which also challenges upper-back extension and shoulder mobility. That makes it a mobility exercise as well as a strength one.
Why it matters for training: Holding an upright torso with the arms overhead while your legs work builds the upper-back strength and mobility that help you stay upright in squats, especially front squats.
Technique: Stand with your feet together or hip-width apart. Bend your knees and sit your hips back and down, as if sitting into a chair, keeping your weight spread through your whole foot with your heels down. Your knees can travel forward over your toes — that’s normal and safe, as long as they track in line with your feet. Reach your arms overhead, lift your chest, and lengthen your spine. Go only as deep as you can while keeping your lower back neutral. Keep breathing throughout.
Duration: 5 to 10 breaths, repeated 2 to 3 times.
CATEGORY 2: FLEXIBILITY AND OPENING YOGA POSES
These poses target areas many active people feel as tight — the front of the hips, the hamstrings, the upper back, and the chest and shoulders — often more because of long hours of sitting than because of training itself. As our mobility page explains, flexibility improves mainly as your nervous system becomes more comfortable with stretch, and total weekly stretching time matters more than holding any single stretch for a long time. Holds of 30 seconds to a couple of minutes work well; yin-style holds of 3 to 5 minutes are a relaxing way to accumulate time.
Low Lunge / Dragon Pose (Anjaneyasana)
What it does: Stretches the front of the hip of the back leg, including the hip flexors and psoas. With the back knee on the floor and the front foot forward, the stretch runs through the front of the back hip and thigh.
Why it matters for training: Tight-feeling hip flexors are among the most common complaints of people who sit a lot, and stretching them improves how far you can extend your hip. That’s useful for lunges, sprinting, and finishing hip extension in deadlifts and hip thrusts. (Despite popular claims, hip flexor length has only a weak link with pelvic tilt or lower back pain, so think of this as a mobility tool rather than a posture fix.)
Technique: Step one foot forward into a lunge and lower the back knee to the floor, with padding underneath if needed. The front knee tracks over the front foot. Before sinking forward, gently tuck your pelvis under and squeeze the glute of the back leg — this targets the hip flexors far more effectively than simply sinking deeper and arching your lower back. Keep your torso upright, with hands on the front knee or reaching overhead. For the yin version (Dragon), lower onto your forearms inside the front foot.
Duration: 30 seconds to 2 minutes per side in dynamic practice; 3 to 5 minutes per side in yin practice.
Pigeon Pose (Eka Pada Rajakapotasana)
What it does: Stretches the muscles that rotate the hip outward — including the piriformis and the deep hip rotators — and the glutes of the front leg.
Why it matters for training: Many people find pigeon a satisfying stretch for the outer hip and glutes after lower-body training. It’s worth knowing its limits, though: hip “impingement,” where the hip pinches at the front in deep squats, is usually caused by the shape of the hip bones rather than tight muscles, and deep hip flexion in pigeon can actually aggravate it. If pigeon causes pinching at the front of the hip, back off.
Technique: From all fours, bring one knee forward toward the same-side wrist and lower that shin to the floor at an angle. Extend the back leg straight behind you. Lower your hips toward the floor, using a folded blanket under the hip of the front leg if it doesn’t reach. Fold forward over the front shin for more intensity. You should feel a deep, dull stretch in the outer hip and glute — not sharp pain, and nothing in the knee. If your knee complains, try the supine “figure-four” stretch instead: lying on your back, cross one ankle over the opposite knee and draw that thigh toward your chest. It stretches the same muscles with no strain on the knee.
Duration: 30 seconds to 2 minutes per side in dynamic practice; 3 to 5 minutes per side in yin practice.
Seated Forward Fold (Paschimottanasana)
What it does: Stretches the back of the body — hamstrings, calves, and back muscles — in a seated position that lets the stretched muscles relax.
Why it matters for training: Tight hamstrings can make it hard to reach the bar in a deadlift without rounding your lower back, and better hamstring flexibility helps with hip-hinge movements generally. (Contrary to a common belief, tight hamstrings rarely limit squat depth — in a squat, the hips and knees bend together, so the hamstrings barely change length. Ankle and hip mobility matter much more there.)
Technique: Sit with your legs extended and your toes pointing up. Hinge forward from your hips rather than your lower back, reaching toward your feet. Keep your spine long at first; let it round gently only once you’ve reached your hip limit. Hold your feet, ankles, or shins — or loop a strap around your feet. Relax rather than forcing the fold, letting gravity do the work. If you have osteoporosis or low bone density, avoid deep rounded forward folds and keep your spine long instead.
Duration: 30 seconds to 3 minutes, easing deeper as you relax.
Supported Fish Pose (Matsyasana)
What it does: Opens the upper back into extension — counteracting the rounded-forward posture of long hours at a desk or on a phone. A yoga block under the upper back lets gravity do the work, giving a passive extension stretch.
Why it matters for training: Limited upper-back extension is a common limit on overhead pressing and the front-squat rack position. Supported fish is a simple, effective way to work on it at home.
Technique: Place a yoga block on its medium height on the floor. Lie back so the block sits between your shoulder blades, around the middle of your upper back. If your neck is comfortable, let your head rest back; otherwise, place a second block or a folded blanket under your head for support. Let your arms rest out to the sides, palms up. Breathe slowly, letting your upper back soften over the block with each exhale. Move the block slightly up or down to find the most useful spot.
Duration: 1 to 3 minutes, moving the block to different levels of the upper back during a session.
Doorframe Chest Opener / Reverse Prayer
What it does: Stretches the chest and the front of the shoulders.
Why it matters for training: Many people who press regularly — and many who spend long hours rounded over a desk — feel tight across the chest and front of the shoulders, which can limit overhead range and the front-rack position. Stretching helps, but strengthening the upper back and rotator cuff with exercises such as rows and face pulls matters just as much for healthy, balanced shoulders.
Technique — Doorframe: Stand in a doorway with your forearms on the frame and elbows bent at 90 degrees. Step gently forward through the doorway, letting your chest open. Raise or lower your arms to target different parts of the chest and shoulders.
Technique — Reverse Prayer: Bring your hands behind your back and press your palms together, fingers pointing up. Draw your elbows back and lift your chest. If this strains your wrists, hold opposite elbows or forearms behind your back instead.
Duration: 30 to 90 seconds per position; 2 to 3 repetitions.
Reclined Butterfly (Supta Baddha Konasana)
What it does: Gently opens the inner thighs and groin while you lie back and breathe deeply. Because the position is supported, the muscles can relax and release gradually under gravity.
Why it matters for training: Inner-thigh flexibility helps with wider-stance squats and deep squat positions. The relaxed, supported position also makes this an ideal way to begin a recovery session or a wind-down before sleep.
Technique: Lie on your back, bring the soles of your feet together, and let your knees fall out to the sides. Support your knees with folded blankets or blocks if the stretch feels too intense or your knees don’t rest comfortably. Rest your arms at your sides, palms up. Breathe slowly and let your hips relax a little more with each exhale.
Duration: 3 to 10 minutes — one of the poses best suited to long, relaxed holds.
CATEGORY 3: BALANCE AND FOCUS YOGA POSES
These poses develop single-leg stability, body awareness, and the steady attention that balancing demands. They connect most directly with our interoception and body awareness and mindfulness in movement pages — and balance training has some of the strongest injury-prevention evidence of any form of exercise: in a major 2014 meta-analysis, it reduced sports injuries by about half.
Tree Pose (Vrksasana)
What it does: Develops single-leg balance and strength in the standing leg’s hip and ankle, and requires sustained attention to stay balanced. Standing on one leg challenges your balance systems far more than standing on two.
Why it matters for training: Poor single-leg balance is linked with a higher risk of ankle sprains, and single-leg control helps keep the knee aligned in lunges, step-ups, and running. Tree pose is a simple, effective way to train it.
Technique: Stand on one leg. Place the sole of your other foot on your inner ankle, calf, or inner thigh — avoiding the side of the knee. Bring your hands together at your chest or reach your arms overhead. Fix your gaze on a point that isn’t moving (drishti) — this is the single most helpful support for balance. Breathe steadily. When you lose your balance, simply return to your focus point and try again — the returning is part of the practice.
Duration: 5 to 10 breaths per side, repeated 2 to 3 times.
Warrior III (Virabhadrasana III)
What it does: Builds single-leg balance and strength in the glutes, hamstrings, and back of the standing leg, in a single-leg hip hinge. Holding your body level and extended requires the whole body to work together, making it one of yoga’s more demanding balance poses.
Why it matters for training: It’s the same movement pattern as the single-leg Romanian deadlift — an excellent exercise for posterior chain strength and single-leg stability. Warrior III trains the balance and control side of that pattern; the weighted version adds the strength.
Technique: From standing, hinge forward on one leg while extending the other leg behind you. Reach your arms forward, or keep your hands on your hips for an easier balance. Your body forms a T-shape — torso roughly parallel to the floor, standing leg straight or slightly bent, back leg in line with your torso. Keep your hips level: the hip of the lifted leg tends to rise and open, so actively turn it down. Breathe steadily.
Duration: 5 to 8 breaths per side.
Half Moon Pose (Ardha Chandrasana)
What it does: Builds side-to-side hip stability — strengthening the outer hip muscles of the standing leg, including the gluteus medius — while opening the chest and rotating the upper body. It challenges the hip in a direction that squats and deadlifts don’t.
Why it matters for training: Outer-hip strength helps keep the pelvis level and the knee aligned in single-leg movements, running, and squats. For people whose training is mostly forward-and-back movement, half moon adds valuable side-to-side stability work.
Technique: From Warrior II, shift your weight onto your front foot and place one hand on the floor or a block about 30 cm in front of and slightly outside that foot. Lift your back leg until it’s parallel to the floor. Stack your hips, opening the top hip toward the ceiling, and reach your top arm upward. Resist collapsing toward the floor. Breathe steadily.
Duration: 5 to 8 breaths per side.
Eagle Pose (Garudasana)
What it does: Develops single-leg balance while stretching the upper back and the back of the shoulders with the crossed arms. Wrapping one leg around the other stretches the outer hip and glute of the wrapped leg, and the bent standing leg builds strength and balance.
Why it matters for training: The crossed-arm position stretches the muscles across the upper back and the back of the shoulder — an area many people who train feel as tight, and where restriction can limit the shoulder’s ability to rotate inward.
Technique: Stand on one leg with the standing knee slightly bent. Cross the other thigh over the standing thigh and, if you can, wrap that foot behind the standing calf — or simply rest its toes on the floor for balance. Cross your arms at the elbows, with the arm on the same side as the lifted leg underneath, and wrap your forearms so your palms come toward each other. Lift your elbows to shoulder height and draw them away from your face. Sink your hips slightly and breathe into your upper back.
Duration: 5 to 8 breaths per side.
CATEGORY 4: RECOVERY AND RESTORATION YOGA POSES
These poses help you wind down and support the calmer nervous system state that recovery involves. They need little or no muscular effort and work best held for longer, with slow, relaxed breathing. They’re the core of the recovery sessions described on our mobility page and of a pre-sleep practice.
Legs Up the Wall (Viparita Karani)
What it does: Raising your legs shifts blood from your legs toward your chest. Pressure sensors in your heart and major blood vessels detect the change and can trigger reflexes that slow the heart — a plausible reason this simple pose feels so calming. It also gives a gentle, passive hamstring stretch.
Why it matters for recovery: It’s one of the easiest, most accessible ways to wind down — after training, after a long day on your feet, or before bed. There’s little direct research on this pose specifically, but it combines rest, slow breathing, and a reflex-driven calming effect, and it’s safe for almost everyone.
Technique: Sit sideways with one hip close to a wall. Roll onto your back and swing your legs up the wall. Adjust your distance from the wall so your legs can rest comfortably without effort — further away if your hamstrings are tight. Rest your arms at your sides, palms up. Close your eyes and breathe slowly and deeply.
Duration: 5 to 20 minutes — one of the safest poses for long holds.
Supine Twist (Supta Matsyendrasana)
What it does: A gentle, passive rotation of the spine that stretches the muscles of the back and sides of the torso. Lying down lets your muscles relax completely while gravity does the work.
Why it matters for recovery: Many people feel tightness in the lower back and sides after training, and a supine twist is one of the most comfortable ways to ease it. Lying down with slow breathing also makes it an ideal recovery and pre-sleep pose.
Technique: Lie on your back. Draw one knee toward your chest and guide it across your body toward the floor on the opposite side with your opposite hand. Extend the arm on the same side as the bent knee out to the side, palm down. If your neck is comfortable, turn your head away from your knee. Let the shoulder of the extended arm stay on or near the floor — place a pillow under your knee if it doesn’t reach the floor comfortably. Breathe into the sides of your body.
Duration: 1 to 3 minutes per side.
Child’s Pose (Balasana)
What it does: Gently rounds the spine and stretches the back, hips, and — with knees wide — the inner thighs, in a curled, restful position. It’s the most accessible rest pose in yoga and the default position to return to whenever you need a break during practice.
Why it matters for recovery: Many people find the gentle rounding of child’s pose a relief after training, and the curled, supported position combined with slow breathing makes it naturally calming.
Technique: From all fours, sink your hips back toward your heels and lower your forehead to the floor, or onto stacked fists or a block if it doesn’t reach. Keep your knees together for more stretch through the back, or wide apart to stretch the inner thighs and let your belly rest between them. Extend your arms forward or rest them alongside your body. Breathe slowly into the back of your body. If your knees are uncomfortable, place a folded blanket between your thighs and calves.
Duration: 1 to 5 minutes.
Savasana (Corpse Pose)
What it does: Complete, conscious stillness at the end of practice. With all physical demands removed, your heart rate and breathing settle, and you have time to absorb the calming effects of the session. It’s one of the most important parts of a yoga practice — and the one most often cut short or skipped.
Why it matters: Savasana isn’t just lying down — it’s a deliberate practice of relaxing completely while staying aware. For many people, it’s the most deeply restful part of the session. Skipping it is a bit like leaving a training session without a cool-down: not harmful, but you miss a valuable part of the experience.
Technique: Lie flat on your back with your legs slightly apart and your feet falling naturally outward. Rest your arms slightly away from your body, palms up. Close your eyes. Let the floor support you completely, releasing any muscular holding. Breathe naturally without controlling the breath. When your mind wanders — and it will — return your attention to the sensations of lying on the floor. Stay still for the whole time. A pillow under your knees can make lying flat more comfortable for your lower back.
Duration: At least 5 minutes after any yoga practice; 10 to 20 minutes after a dedicated restorative session.
Supported Reclined Butterfly (Extended)
What it does: Combines the inner-thigh opening of reclined butterfly with the upper-back opening of supported fish, using a bolster or rolled blankets along your spine. The result is a gentle, fully supported opening of the front of the body that requires no muscular effort.
Why it matters for recovery: It opens two areas many people feel as tight — the inner thighs and the chest and upper back — in one completely relaxed position. It’s an excellent final pose before savasana in a recovery session.
Technique: Place a bolster or three to four folded blankets lengthwise on the floor. Sit at one end with your legs in the butterfly position — soles of the feet together, knees falling out. Lie back along the bolster, letting your upper back open over it. Support your outer knees with blankets or blocks if needed. Rest your arms comfortably at your sides. Breathe slowly and deeply.
Duration: 5 to 10 minutes.
Practicing Safely
Yoga is generally safe, with injury rates similar to other forms of exercise, as our yoga evidence base page explains. A few principles keep it that way:
Know the difference between stretch and pain. A dull, spreading stretch sensation is normal. Sharp, stabbing, or pinching pain, pain in a joint rather than a muscle, numbness or tingling, or pain that lingers afterwards are signals to back off — as our discipline over motivation page explains.
Protect vulnerable areas. Spread your weight through your whole hand in plank and chaturanga to protect your wrists. Pad your knees in kneeling poses. Support your head in supported fish if your neck isn’t comfortable dropping back. And use the figure-four alternative to pigeon if your knees or hips complain.
Check first if you have specific conditions. If you have osteoporosis, avoid deep rounded forward folds and strong twists. If you’re pregnant, have had recent surgery or injury, or have high blood pressure, glaucoma, or a joint condition, talk to your doctor and look for a qualified teacher who can adapt poses for you.
Building a Personal Practice
The poses above give you a complete toolkit for the four main ways yoga can support your training and recovery. A practical way to use them:
Pre-training warm-up (10 to 15 minutes): Sun salutations — flowing through plank, chaturanga, and warrior poses — followed by strength and balance poses relevant to your session. Keep any static holds short before training; long static stretches of more than about a minute per muscle can slightly reduce strength and power, so save those for later.
Post-training recovery (10 to 20 minutes): Flexibility poses for the areas you trained, held for 1 to 2 minutes each — for example, low lunge, pigeon or figure-four, and seated forward fold after lower-body sessions; supported fish, chest openers, and eagle arms after upper-body sessions.
Dedicated yin or restorative session (45 to 75 minutes, once or twice a week): The flexibility poses held for 3 to 5 minutes each, finishing with legs up the wall, a supine twist, and a full 10-minute savasana.
Pre-sleep practice (20 to 30 minutes): Reclined butterfly, supported fish, a supine twist, child’s pose, and legs up the wall — each held for 3 to 5 minutes — followed by savasana, with slow, relaxed breathing through the nose throughout.
Consistency matters more than the length of any single session. Flexibility improves with total stretching time accumulated week after week, and several short sessions a week are easier to keep up than one long one — while regular practice also makes the calming effects of yoga easier to access when you need them.
The Bottom Line
Yoga poses are tools, each with its own effects. Understanding what each pose does and why turns yoga from a routine to follow into a practice to use intelligently — choosing poses for the positions you want to improve, the recovery you need, and the focus you want to develop. The four categories cover what yoga’s physical practice offers: strength and control through range from active poses, improved flexibility from opening poses held consistently over time, balance and focus from balance poses, and relaxation and recovery from restorative poses. Used together and practiced safely, they make a well-rounded complement to serious training and a demanding life.